Showing posts with label Vegetarian. Show all posts

Tuesday, March 12, 2013

Apple-Cauliflower Soup

Listlessness. Exhaustion. Insomnia. Hence Inertia. This pretty much sums up the way I've been feeling for the past several weeks. I am not able to get myself to blog as often as I'd like to even if have made numerous delicacies and photographed some if not all of them. Give me some motivation guys - tell me something in your comments that makes me want to come back. I thank all the wonderful souls who have stopped by to comment on my blog - you are the reason I feel responsible to be consistent (to the best possible) with my recipes. 

Did I tell you that we got snowed in like the dickens and had no electricity or water (yes primitive living conditions in the most advanced nation - simply because we are on a well)  - Cold frigid nights, melting snow for water - need I say more - We have resolved to invest in a genie this year. 

Getting to recipe, this soup was conceived of a cauliflower waiting to be cooked and an apple, the last of the lot. I decided I would put them together and make this delicious soup (for the soul) and that's exactly what I did - My littlest one LOVES soups and she devoured it verily!

Ingredients
  • 1 medium cauliflower hear 
  • 1/2 onion (optional)
  • 1stalk of celery
  • 1 apple (I only buy Pink Lady apples)
  • 1 can of evaporated milk (optional can be subbed with water)
  • 1pinch of freshly ground nutmeg
  • 1tsp of freshly ground all spice
  • 1-2 tsp of olive oil

For garnishing since this is a rather mild soup
  • 1 jalapeƱo (optional) or freshly ground pepper kernels, cilantro
  • roasted almonds or cashews or freshly grated parmesan

Method


  1. Cut cauliflower into florets
  2. dice onions and apples and cook in olive oil.
  3. Add the evaporated milk and let it all cook together
  4. Add salt and remove from flame
  5. Grind into a smooth soup 
  6. Add the spices 
  7. Pour back into pan and let it cook some more

Serve hot with recommended garnish


Monday, February 18, 2013

Baked Stuffed Zucchini


This wonderful dish is at once light, delicious and awfully simple to make. It can be light based on what you choose to stuff the zucchini with - If you are thinking mozzarella, cream cheese,  meat, or some other high calorie stuffing, think again - We had this dish at a local restaurant and even as we were eating it, I had resolved to make it. This falls under the gourmet category and certainly has the WOW factor when it comes to impressing your family, friends or a very special person in your life. So go ahead and give it a try - takes all of 30 minutes to make and the end result is most "appointing" - used as an antonym to disappointing :)


Ingredients


  • 2- 3 medium sized fresh Zucchinis
  • 1/3 cup of greek yogurt (I recommend Fage)
  • 3 tbps of mascarpone ( entirely optional) Can be substituted with more greek yogurt
  • 1 tbsp of Miscuglio (a fine blend of italian herbs and spices)
  • Tomato Sauce - We made ours with diced tomatoes, garlic and some red chilies and italian herbs
  • 2/3 cup of grated sharp cheddar cheese for topping before baking
  • Olive oil for brushing
  • Bread crumbs for sprinkling


Method

  1. Set oven to 400
  2. On the slicer side of the grater, make long thin strips of the Zucchini 
  3. Arrange on a baking pan and gently brush with olive oil and bake for about 10 minutes
  4. In the meanwhile, prepare your baking dish
  5. Add the tomato sauce to the bottom of the dish and keep
  6. In a bowl, mix the yogurt and the mascarpone together along with the Muscuglio. 
  7. Remove Zucchini from oven and let cool for a few minutes (else the yogurt will get liquify in the heat)
  8. Once cooled,  add a tsp of he yogurt mix to one end of the strip and roll the zucchini as shown in the pictures
  9. Once all of them are made
  10. Place gingerly on the tomato sauce in baking dish
  11. Top with the smallest amount of break crumbs
  12. Add the grated cheese over the rolls
  13. Bake again at 400 for about 15 minutes 


Serve HOT :)


Monday, February 11, 2013

Garden Veggie Burger


I was not kidding when I wrote on FB that this dish is versatile and international in its appeal - it is called by different names depending on where  - One ma's cutlet is another man's patty and one man's vadai is another's falafel and patty to one is burger to yet another and so on - it can morph into the name you choose for it since all it is a luscious, delicious vegetable preparation that can be eaten by itself or with a bun/pita. The best part is it is loaded with  quinoa flakes thus making it a highly nutritious and protein enriched all in one burger.  So you can reasonable avoid all other carbs and eat it solely.

This was an idea conceived literally 20-25 minutes before it became what it is in the pictures below - Opened the fridge door, saw a couple of zucchinis which were aging but still intact, and some fresh heads of broccoli - I knew exactly what I wanted to make and how.

Finely grate the veggies in question - take a cup of besan or chick pea flour, 2 cups of quinoa flakes and 1 tbsp of freshly homemade sambar powder of spices of your choice - the only other thing I added was garlic flakes.

NO WATER needed - The juice from the veggies is enough to mix into a thick batter
Spray your pan, make lemon sized balls of veggie mix and pat down to flatten
Broil for 15-18 minutes
or Use your Kuzhi paniyaram dish to make them like Falafels.

This is my protein rich recipe for this month's Avant Garde Cookies first post.


Ingredients:

  • 3 medium sized broccoli heads finely grated
  • 2 medium zucchinis finely grated with skin on
  • 2+cups of Quinoa flakes
  • 1 cup of besan (chickpea flour)
  • (spice it the way you like best - garlic, green chili, ground black pepper or ginger)
  • I used 1 tbsp of Sambar powder - (this contains cumin, coriander, dry cayenne chilies, split peas, sesame, fenugreek, turmeric and a couple of other ingredients (recipe to follow soon) 
  • 1tsp garlic flakes
  • a fist full of peanuts, ground (entirely optional)
  • salt
  • NO WATER

Method

  1. Add the dry besan, sambar powder, salt and garlic flakes in a large bowl and mix them
  2. Add the grated veggies and mix in with the dry flour and spices
  3. Considering how much water zucchini and broccoli can let out, the mix may be a little liquidy
  4. Now add 1 cup of quinoa and stir in
  5. Add the second cup and check consistency after stirring in -
  6. If it is still too sticky, add more flakes 
  7. Spray a baking pan and make lemon-sized balls of the batter
  8. place and flatten to patty style
  9. Broil for about 15-18 minutes depending on your oven
  10. I turned them over at about 14 minutes
  11. If you have the dippy donut pan, you can spray them lightly and use that as well for making this  - will look more like falafels. 
  12. Enjoy with buns, pitas or just like that.


Tuesday, January 29, 2013

Sabudana Khichdi - A Maharastrian staple sensation :)


This is one dish I have had several times at my sister's home in Pune and loved. I have been told that tapioca is a high calorie grain and if not done in a proper manner, this khichdi could be an oil guzzler - I have had a couple of sticky gooey efforts in the past simply because I refused to use the oil, but I'll be darned if I did not do it my way and yet make a hit of it - recently had it at someone's place who happened to be from Maharastra and I asked her and she led me to none other than Divya of Chef in You fame - I checked it out and the realized the two Key things to do to make this are
1) you must use the big sabudana for this dish and 2) you must soak in water just covering the top of the tapioca overnight or for a minimum of  5-8 hours

Garnish, spices, herbs etc are changeable and up to personal preferences. But peanuts are a must :)
It turned out spectacularly and I am happy that this ghost will rest, conquered - booyah!

Serving size -4-5
Ingredients

  • 1.5 cups Sabudana (tapioca) soaked overnight in water barely covering the pearls
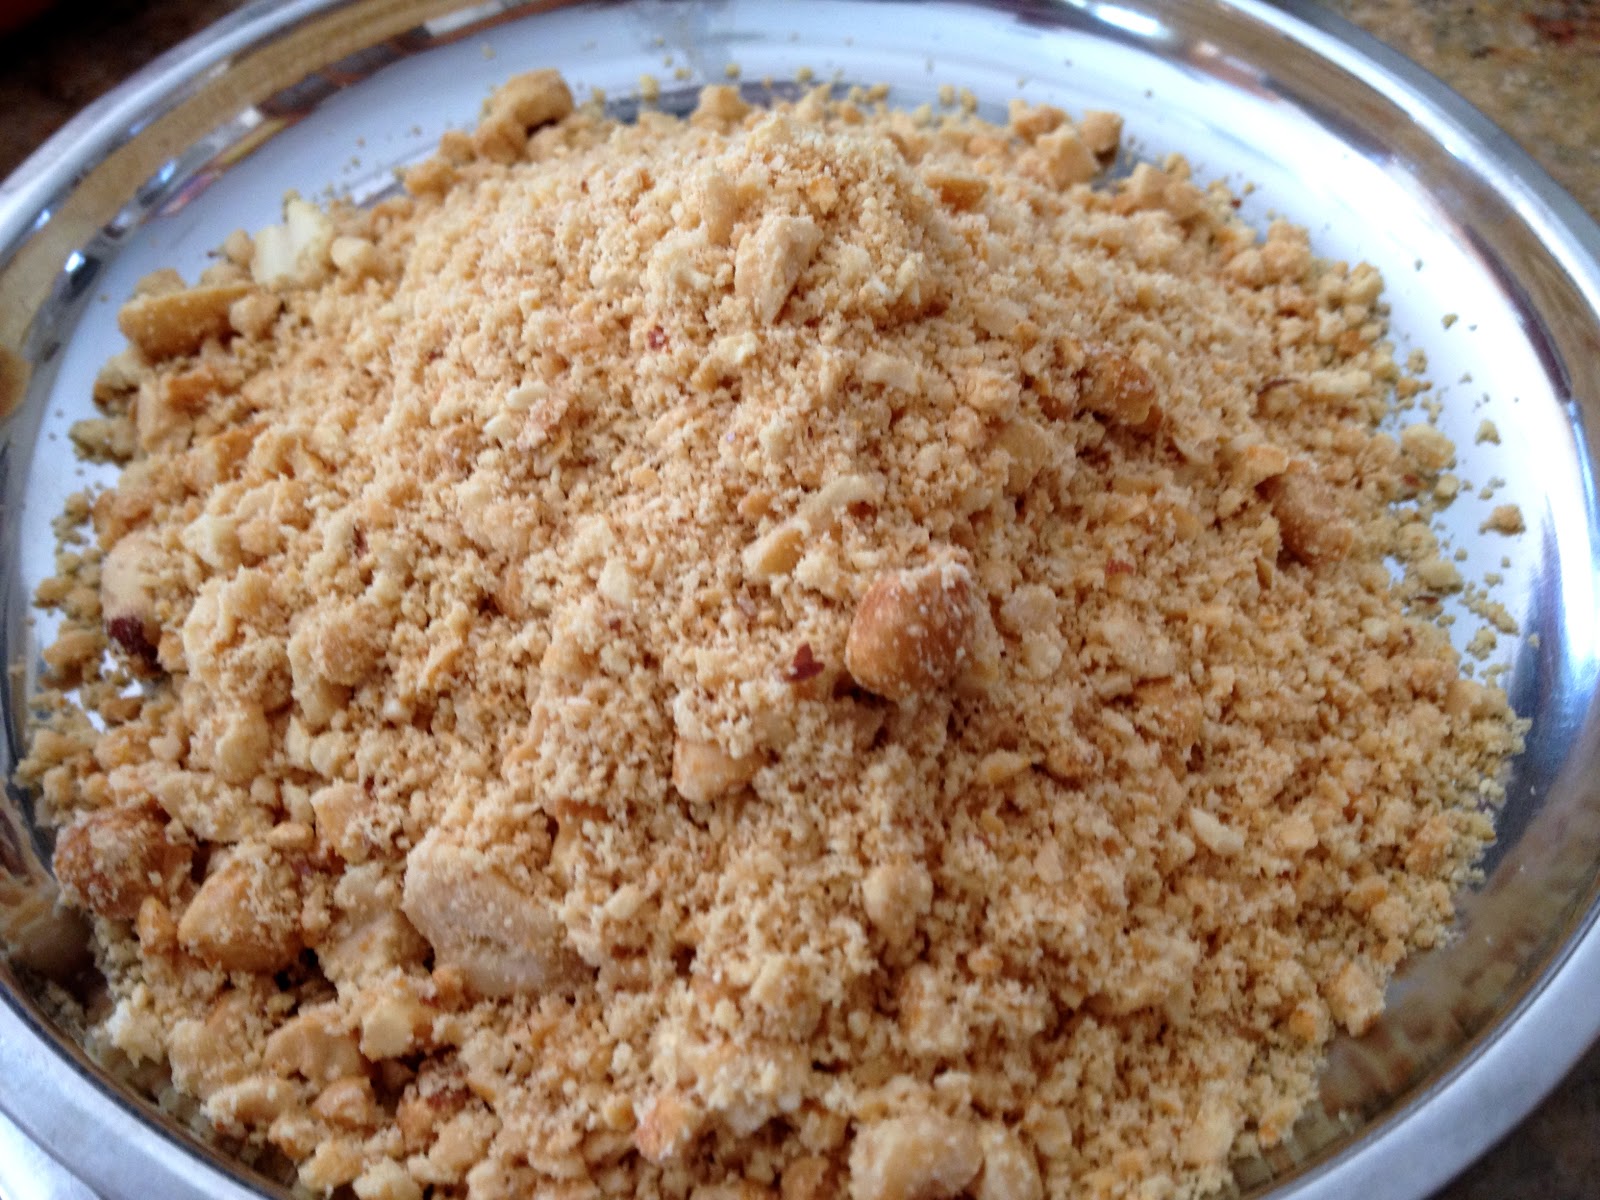
  • 1/2 cup crushed peanuts
  • 1 med. onion
  • 1/2 cup grated coconut
  • 3 spicy green chilies
  • 1 tsp grated ginger
  • curry leaves
  • 1tsp of olive/sunflower/corn oil

For tempering

  • 1/2 tsp cumin
  • 1/2 tsp urad dal
  • a pinch of asafetida

For garnish

  • Finely chopped cilantro

Method

  1. Loosen the soaked tapioca pearls to separate
  2. In a pan, sautee the urad cumin and asafetida followed up with the onions, ginger and green chilies
  3. When they are getting caramelized, add the sabudana and stir in -you will notice them getting translucent from being solid white
  4. Add salt at this point and mix well 
  5. Follow up with the crushed peanuts
  6. In a small pan, lightly dry roast the grated coconut to get rid of the rawness
  7. Add finally to the Khichdi and mix well
  8. Remove from flame 
  9. Garnish with cilantro
  10. Serve HOT


NOTE Common additions to this khichdi are finely cubed and roasted potatoes. You can be as creative as you want with your veggie additions. I plan to be the next time around

Enjoy folks until the next time, signing off with love.


Tuesday, January 22, 2013

Onion & Peanut Chutney


A simple quick and fabulous chutney to accompany dosa, (lentil crepes) Idlis (savory cakes) or even mix in with rice. Having the kids home demands that you be quick and creative - it is always a pleasure to have them home, but the problem usually is coming up with an idea for  a meal more than making it - I am sure all you experienced chefs out there would agree - Rava Idlis and Chutney seemed like a perfect light and simple lunch to make- So we did and it was enjoyable - And what was best is although it is frigid outside, the sun shines even brighter making for good pics - Lately I have made food that I wish to blog in the evening and Jan evenings are usually gloomy and dark even by 5, making for not so great pics of really good food - Will strive to be more efficient with the daylight hours for blogging.


Here is the recipe
Ingredients
1 big red onion
1 handful of roasted peanuts (husk free)
3-4 of your spicy dried red chilies
1tsp of sesame oil

For tempering
a pinch of asafetida
1/4 tsp mustard seeds
fresh curry leaves
1tsp of sesame oil

Method
In a wok/kadai/frying pan heat the oil and add the ingredients and cook until onion is translucent
Cool and grind
Temper with the suggested ingredients

Serve with Idlis, dosas, rice or chapatis - See here with hot and delicious Rava Idlis


Enjoy

Tuesday, January 15, 2013

Khobz - A Delicious Moroccan Bread

Khobz 


Happy Kanu Pongal to all - feeling quite under the weather - I had contracted Lyme Disease a few years ago and the recurring effects of it are joint pains - My knees are begging for mercy from a sharp shooting pain that has ruled my life for almost 24 hours now! I am quite sick of taking Advil and have resorted to arnica - hoping to get an acupuncture appointment for it Sigh! feeling better after off loading some of my woes!

I had made this bread several weeks ago but it is good I held back posting it for this week with the Avant Garde Cookies, we are making breads - And this is a wonderful addition to any dinner table. Not much different from any other bread in so far as the recipe goes, what sets this apart is the incredible crustiness of the outside shell and the incredible softness of its inside.

How it came about
We had gone to a local Moroccan restaurant, one that has apparently been around for over 3 years and this was the first time we'd paid attention. The food was not great, but good. However, what had me raving was the Khobz - it was out of sight yummy. I did talk to the chef and owner about it and he did not really reveal the recipe, but said it needed a lot of kneading.

More internet searches reveal recipes that were not any different from any other kind of bread. So I took the chef's word for it and kneaded it for an extra long time in my mixer. The other trick was to use lesser water and keep the dough somewhat tough. I did use 1 tbsp of olive oil. While mine was really tasty and well-received, I know I "knead" a lot more to get the same great bread from the restaurant - practice maketh perfect -
One last hint from the chef - rewarming the bread also gives it the crispiness on the shell and the softness inside... so go ahead and give it a try -If nothing else, if you are in Morocco sometime, you'll at least know to order khobz :)  Presenting Khobz

Khobz as explained by about.com

Moroccan and Standard Arabic: الخبز
Khobz is the Moroccan and standard Arabic word for bread. TheTamazight (Berber) word kesra and Tashelhit (Shilha) word agroummight also be used, as might the French word pain.
Although khboz and kesra may mean different things to different Moroccans, both terms are used in a general sense to refer to oven-baked bread which is shaped into round, flattish loaves with lots of crust. During a traditional Moroccan meal, khobz often replaces utensils such as forks or spoons as it is used to scoop up meat, vegetables, sauce, salads, dips and more.
Different types of flour can be used to make khboz. Exactly what goes into each loaf, and how large or small it is shaped, is a matter of personal preference. White, semolina, wheat, rye, bran and barley are some of the flours that might be used, while anise and cumin seeds are just two additions that could be added for extra flavor.
In rural areas, many families use small dome-shaped wood burning ovens to bake their bread. In urban areas, families might opt to bake their bread do so in public street ovens. Both methods give bread a unique flavor and character that simply can't be matched in a conventional oven or by Moroccan bakeries. Nonetheless, very good Moroccan bread can be baked in home ovens, and it's worth trying to make your own bread to complement a Moroccan meal.
Recipe is replicated from About.Com - thank you!


I added some thyme and moroccan spices for flavor


Allow 1 hour rising time. Yields two 8" to 9" round loaves.

Prep Time: 20 minutes

Cook Time: 25 minutes

Rising time: 1 hour

Total Time: 1 hour, 45 minutes

Ingredients:

  • 4 cups white flour
  • 2 teaspoons salt
  • 2 teaspoons sugar
  • 1 tablespoon yeast
  • 2 tablespoons vegetable oil
  • 1 1/4 cup warm water
  • additional flour for kneading
  • cornmeal, semolina or oil for the pan

Preparation:

Prepare two baking sheets by oiling the centers, or by dusting the pans with a little cornmeal or semolina.
Mix the flour, sugar, and salt in a bowl. Make a large well in the center of the flour mixture, and add the yeast.
Add the oil and the water to the well, mixing to dissolve the yeast first, and then stirring the entire contents of the bowl to incorporate the water into the flour.
Turn the dough out onto a floured surface, and begin kneading the dough. If necessary, add flour or water in very small amounts to make the dough soft and pliable, but not sticky. Continue kneading for 10 minutes, or until the dough is very smooth and elastic.
Divide the dough in half, and shape each portion into a smooth circular mound. Place onto the prepared pans, and cover with a towel. Allow to rest for 10 minutes.
After the dough has rested, use the palm of your hand to flatten the dough into circles about 1/4" thick. Cover with a towel, and leave to rise about one hour, or until the dough springs back when pressed lightly with a finger.
Preheat an oven to 435°F (225°C).
Score the top of the bread with a very sharp knife, or poke the dough with a fork in several places. Bake the bread for about 20 minutes – rotate the pans about halfway through the baking time – or until the loaves are nicely colored and sound hollow when tapped. Transfer the bread to a rack or towel-lined basket to cool.


Tuesday, January 8, 2013

Colonial Virginian Peanut Soup


I got the opportunity to make this soup for a women's get together - Our host lived in a home built in the time of Jefferson's era and Monticello and we were excited to get a tour of the house. The theme for the potluck was also colonial. When the wonderful lady that organizes the events wrote to us the food she wanted brought, I plumped for the peanut soup - 1) another great soup to my repertoire 2) more importantly, I was for the first time in 10 years of living here making an authentic Virginian recipe - how cool was that! This soup is said to have some roots in Africa and could've have come to the US when the slaves were brought in (not times I like to dwell upon). But the fact that Virginia is so well known for peanuts, make it easy to assume that they found various uses for their peanuts and the soup was one of them.

I have made it twice so far, an this be my third attempt - Both the earlier occasions, I missed out on taking pictures, but this time I made the soup just to take the pictures, lol

I got this recipe off the web from Colonial Williamsburg's old King's Arms Tavern The recipe is quite simple and absolutely delicious. But it is pretty bland and using a little all spice and nutmeg took the soup to a whole new level of satisfaction

For those who know me well, I tried to make a less-guilty more contemporary version of this highly rich and fatty soup - without a single compromise to the taste, I guarantee.

So here goes.


Ingredients 

  • ¼ cup (1/2 stick) unsalted butter (substitute with 1tbsp olive oil)
  • 1 medium onion, finely chopped
  • 2 celery ribs, finely chopped
  • 3 tablespoons flour (NOT required - Soup is creamy and thick enough without this)
  • 8 cups Chicken Stock* (or low-salt canned chicken stock)This I definitely substituted with Trader Joe's Vegetable broth)
  • 2 cups smooth peanut butter (I used the natural kind from Skippy)
  • 1 ¾ cups light cream or half-and-half (You can safely cut this down by a half or even less)
  • Finely chopped salted peanuts, for garnish
Instructions

  1. In a large saucepan or soup pot over medium heat ,heat the oil. Add the onion and celery and cook, stirring often, until softened, three-five minutes.
  2. Stir in flour and cook two minutes longer.
  3. Pour in the broth, increase the heat to high, and bring to a boil, stirring constantly. Reduce the heat to medium and cook, stirring often, until slightly reduced and thickened, about 15 minutes. Pour into a sieve set over a large bowl and strain, pushing hard on the solids to extract as much flavor as possible. Return the liquid to the sauce pan or pot.
  4. Whisk the peanut butter and the cream into the liquid. Warm over low heat, whisking often, for about five minutes. Do not boil.
  5. Serve warm, garnished with the chopped peanuts.
A perfect soup for winter days and autumn days, rainy days and basically any day :) Enjoy with friends and family - A lot more cooking chez moi - will be back soon with another winner recipe :)
Check my Facebook page for more pictures about the process 

Friday, January 4, 2013

Rosy Raita with Beets


My first post for the NEW YEAR was to be my peanut soup - but as I've lamented on my facebook page, both the times I made it were for parties not hosted by me and it got eaten up well before I could remember to take my clicks - But by golly, I will make it again anon and will present it with the aplomb it deserves. But for now let me feast your eyes and senses to this mind blowing raita.

When I first tasted this in Delhi at my sister's house, I was blown away by the color of it - So beautiful and the taste was no less incredible - That very moment, I had resolved to make this once I got back home. While it has taken me months to get to it, I finally did it and it was, as I'd predicted, a huge hit with friends and family alike.  This is a killer dish to brighten any dinner table, its rich color at once brightening the table and the eyes of those that lay sight on it.

What you need:

  1. 1 big beet grated very finely or pureed
  2. 1 carton (32 oz) of yogurt - I used Dannon PlainYogurt
  3. For garnish
  4. 1/2 tsp of fennel seeds
  5. 1/2 tsp of cumin seeds
  6. 1 spicy green chili finely chopped
  7. 1tsp mustard seeds 
  8. 1tsp of oil to pop and sautee the above
  9. Salt

Method

  • Peel and puree (or) finely grate the beet - I chose to do the latter
  • Pour the yogurt into a serving dish and whip it to make it smooth
  • Add the beets and whisk it it
  • Watch the magic of the beautiful rose color engulf the bowl :)
  • Saute the seeds and chili and mix it into the raita
  • Refrigerate until time to serve
  • *Garnish with cilantro if desired.
  • Serve with aromatic pulao like I did 


Enjoy and will be back soon with another yummy recipe - yup- the peanut soup


Monday, December 17, 2012

Easy, Peasy Cheesy Spread


This is my entry for the Hush Hush week of Avant Garde Cookies. Priya Sreeram gave me an easy ingredient - cheese. And I had just stocked the fridge with Feta from the Indian store (never again since it was too salty, but perfect for the dish I made) and Gruyere from Trader Joes.
What to make??? I also had some paneer sitting in the fridge from a previous purchase, however it was not an option for this meal.

I have been cooking but blogging has been a luxury I have been unable to indulge in! Other priorities, kid applying to colleges, baking goodies for all the teachers and friends who have enriched our lives, horrific news that makes me want to sometimes curl up under the comforters with my children and never come out! Oft are the times I feel like taking them all back in my womb where I can keep them safe! If only that were an option! Kids grow up, get bigger than you, finish school and flee the nest in pursuit of their own destinies. As parents you have to learn to dwell on their success and not at the void they leave in the home as they do so!

I want a safe environment for the children and for all the people of the US. Many countries survive just fine with no weapons in their homes - I dream of a gun-free country where people once again learn to love their neighbors and let go of this built up hate and frustration.

Sorry to digress, this is after all a food blog and I am happy that is one thing that can please, made the right way :)


This was an uber delicious spread and a perfect addition to any dinner table and for entertainment.

Ingredients
1 pack of frozen peas (12oz)
1 onion
3 cloves of garlic
1 cup of gruyere cheese
1/4 cup of creamy Feta cheese
3 spicy green chilies
2 tomato
2tsp of olive oil


Method
Sautee until all veggies are cooked.
Add the Feta to the veggies and melt
Cool and grind and put in a baking dish
Add grated gruyere
Bake at 350 for 20 -25 mins

Serve as dip or spread