Tuesday, October 18, 2011

Orange Chutney

Orange Chutney
Add caption
 This idea came about as I was talking to my sweet friend - who was making an orange marmalade (which will hopefully feature in my next guest post as of now scheduled for either November 2011 or Jan 2012) She asked me to come up with a good recipe for an Indianized orange chutney and this is what I came up with - It is truly a chutney for all cravings with its sweet, sour and spicy flavors. A must try for those who like to have a preserve which can be used in more ways than one - My recommendation is to have it with yogurt rice - Heavenly my maties
Orange Chutney
Add caption
This is the 3rd day of the blogging marathon started by Srivalli and my theme is Cooking with Fruits

Ingredients
2 Oranges with rind
1 cup of Jaggery (unrefined sugar) (Increase amount to 1 cup if you desire a sweeter chutney)
3-4 dried red chilies (reduce or increase based on need)
2-3 mint leaves
1 tbsp grated ginger
Juice of 1 lemon
1tbsp sesame oil
1tbsp urad dal
Zest of the 2 oranges (that are being used) and 1 lemon (that is also being used for juice)

Preparation
Soak the zest of the 2 oranges and the lemon in the lemon juice along with the grated ginger
Remove pith and any pips and cut into small bits
Measure 1 cup of jiggery and add to the orange bits in a deep saucepan
Heat oil in a small shallow pan
Add the red chilies and the urad dal and fry until the dal is golden brown
Cook the orange and jiggery for 2 minutes exactly and remove from flame and grind into a coarse paste
Add back into the saucepan and continue cooking
Once the chilies and urad dal are cool, grind them up with the soaked zest juice
Make sure this is a finely blended
Now, add this to the orange jaggery mix and let it all cook for another 2 minutes – Now you will notice that the chutney /relish is thickening and slightly brown from the jaggery
Remove from flame – taste to see if you want to add more jaggery/red chilies
If you find it dancing on your tongue like I did, put in the fridge to cool it down and use it as desired, with toast, chappatis or dosais and idlis!
Check out the other Bloggers in this Marathon


Bon appetite! 
Steps in Pictures
Orange chutney collage


orange chutney 2

Orange Chutney


Orange Chutney
Preserve in a Jar


Monday, October 17, 2011

Pumpkin Papaya Soup

PP Soup

This is a soup that was inspired by having a ripening papaya at home along with pumpkins we picked at the patch. A simple hearty and tasty soup perfect for the cooler days of Autumn and halloween parties :)
It is very South Indian influenced in the spices and herbs that went into it, with a slight touch of Italian, in that I used some rosemary and sage
This is my recipe for Day 2 of Srivalli's Blogging Marathon
Pp Soup

Ingredients

1 Small pie pumpkin ( peeled & cubed)
1/2 big sized ripe papaya (decided, peeled & cubed)
2tbsp coconut powder
2tbsp coriander
2 dry red chilies (I used 2 too many)
4 cloves garlic
2 tsp olive oil
1/2 tsp rosemary crushed
2 leaves sage crushed
1/4 cup almond slivers
1/2 tsp turmeric
PPSoup

Preparation
1.Crush rosemary and safe and keep aside
2. In a frying pan, heat 1 tsp of oil
3. Add the coriander, coconut powder, chilies and garlic and fry until the coconut powder assumes a nice brown crispy color - Dry grind and keep
4. Remove from flame
5. In a separate deep (4-5 quart) pot, add the cubed pumpkin and papaya and allow them to cook adding 1 tsp of salt, turmeric, sage and rosemary
6. When they are soft and mushy, remove from flame allow to cool down
7. Grind into a fine paste in a blender
8. Return the ground up pumpkin- papaya to the pot and add the dry-ground mix into the paste and stir in nicely
9. Set flame at low flame and allow it to simmer for about 4-5 minutes stirring if your pot is not a non-stick
10. Serve HOT

PPSoup

Check out the other Bloggers in this Marathon
This is off to Vardhini of  Zesty Palette's Halloween Fiesta


Sunday, October 16, 2011

Caramelized Pear Tart


pear tartCaramelized Pear Tart

Starting my blogging marathon # 9 with Srivalli with a bang :)
Verge has got the better of me, again and this time some homegrown pears given to us by a friend was a recipe in the making – The luscious pictures in the book were calling out to me. OF the 6 or more pear recipes I decided on the tart –
Now who knew that making the pastry base was such a long and rather complicated process not to mention super highly caloric – I really had no idea! I thought it was like any other dough for breads – Mais non,mes amies, it is an overnight process!
I made it nevertheless, following his instructions to a T – But since then I have scoured the web and found far easier and less caloric ways of making pastry dough – Pardonez moi, Mr Verge, I mean no offense when I say that we have to wean ourselves away from those huge amounts of butter!
The recipe for the pear preparation resulted in exquisite, perfect tasting caramelized pears – mama mia!
Without much further ado, I present to you Mr.Verge’s Caramelized Pear Tart  - Ingredients and preparation instructions have been give verbatim from the book!

PUFF PASTRY
This is the most complicated dough to prepare(Verge) (so I, Priya a novice baker is not the only one)You cannot use a food processor. Everything must be done by hand, with care and precision. But in the end, what lightness, what crispiness-what a delight!
(Sorry I could not photograph the entire process since i was too flustered and buy getting my pastry to work)
Cpeartart

INGREDIENTS- YIELD: THREE 3-INCH TARTS
2 ½ cups sifted flour, plus extra for flouring work surface
1 teaspoon salt
1 pound butter: 
7 tablespoons for binding and the rest for the butter layer, chilled1 cup cold water


Puff pastry

Preparation

  • Bind the dough with water. 
  • In a medium bowl, combine the flour and salt. Form a hole in the middle and fill it with the cold water and 7 tablespoons of slightly softened butter, cut into pieces. 
  • Blend rapidly with your fingers. Form a ball of dough and shape it into a square. 
  • With a knife score the top with a grid pattern. Wrap in plastic wrap and refrigerate for at least 30 minutes.
  • Work the butter. 
  • On a lightly floured board, roll out the rest of the butter into a 3 x 6-inch rectangle. 
  • Add a little flour to the rolling pin as needed. Refrigerate. For everything to work well, the dough and butter must be the same temperature. 
  • Combine the dough and butter. 
  • On a floured pastry board, roll out the dough until you have a rectangle that is about 8 x 12 inches. 
  • Now place the butter rectangle in the center. Fold the edges of the dough completely over the butter, starting with the long sides and then the short sides, pressing the edges of the dough together. 
  • Roll out this package until you have a new rectangle measuring approximately 20 inches in length and 8 inches in width. 
  • Fold it into thirds, folding back and under the short edges. 
  • Turn the board a quarter turn. Roll the dough out again until you have a rectangle of the same size. Again fold into thirds. 
  • Wrap the dough in plastic wrap and refrigerate for 20 to 30 minutes.
  • Repeat the above steps twice: roll out the dough, fold into thirds, let rest. Refrigerate at least 45 minutes or overnight, if desired. Just before using the dough, repeat the steps one more time. 
  • Finish. 
  • Cut the amount you need. Roll out to the desired dimension. Wrap the leftover dough; it will keep for 2 to 3 days in the refrigerator.

Caramelized Pear Tart
This recipe will remind you of a traditional tarte tatin. Have you ever tried to make one with pears? Personally, I almost prefer the pear variation. If you want to stick to tradition, replace the pears with pippin apples and the pear brandy (which is optional) with Calvados


Ingredients

4 ripe pears
Juice of one lemon
2 tablespoons pear brandy (optional)
5 tablespoons butter
½ cup sugar
1/3 recipe puff pastry or short pastry dough
Equipment
cast-iron skillet with high sides, or any frying pan 9 ½ -10 inches in diameter with a heatproof handle.

Preparation
1.Peel the pears. Slice into 6 sections and remove the core and the stems. Sprinkle with the lemon juice and brandy.
2.Preheat the oven to 475 degrees Fahrenheit
3.Melt the butter in the skillet. Add the sugar, stirring, and remove from the heat when the mixture is smooth. Arrange the pear slices in the pan, forming a circle with their tips toward the center.
4.Transfer the pan to the oven and bake for about 20 minutes, until the pears are completely coated with the caramelized sugar.
5.In the meantime, roll out the dough into a circle equal in diameter to the pan. Prick with a fork. Once the pears are caramelized, remove the pan from the oven and cover with the dough, taking care to seal or fold along the sides. Lower the temperature to 350 degrees Fahrenheit. Bake for another 15-20 minutes, until the crust is a beautiful golden color.
6.Remove the pan from the oven. Gently heat for 1 minute on the stove. Shake gently to make sure that the fruit is not sticking to the bottom. Wearing cooking mitts, turn a plate over onto the crust; in one quick movement, flip the pan over. The caramelized fruit should now appear on top. Serve warm. 

slice

Check out the other Bloggers in this Marathon

Wednesday, October 12, 2011

Avial

avial

This is a traditional South Indian delicacy, largely influenced by Kerala cuisine, but well entrenched in Tamil Nadu as well - A festive dish Avial is made with slight differences from region to region, but for this blog hop, I got the perfect blog for the dish - Kaveri's Palakkad Chamayal - This is my post for Blog Hop Wednesday, a wonderful event started by Radhika of Tickling Palates

I have my own recipe for this as well, but I wanted to try out her method while incorporating some of my fav ingredients as well- For those who don't know Kaveri (unlikely) she has an amazing collection of authentic Kerala and Palakkad recipes which really appeal to me esp since coconut is a staple and I love using it in my preparations - Here is Kaveri's recipe

I am late posting this, but it is still wednesday :)
Serves - 6-8 people -1or 2 cups each
Ingredients:

Vegetables -  (some of the veggies she used are not available here)
1/2 - 1 cup each of snake gourd, carrots, chow chow (chayote Squash) yellow bottle gourds,
1 quart plain low fat yogurt
1-2 cups of thick buttermilk (depending on how much gravy you'd like - I am not a thick avial person so I use buttermilk to thin it down)
4-5 green chilies
1/2 cup grated coconut
1/4 tsp Turmeric
1 tsp Cumin
1/4 cup crushed cilantro
1tbsp coconut oil
Avial
Before adding yogurt
Avial
After adding yogurt
Preparation
Steam or pressure cook the veggies with a 1 cup of water and the turmeric
Wet grind the coconut, green chilies,  cumin and cilantro
Pour ground paste into a saucepan and allow it to cook for few minutes - it will thicken
Now add the cooked veggies and the salt and let the mix come to boil
Switch stove off
In a separate bowl, lightly whip the yogurt and the buttermilk and keep
When the veggies in the sauce pan cool down, add the yogurt mix and bring both gravies and yogurt nicely together.
Add 1 tbsp coconut oil at the very end before serving.
avial

Tadka or temper with curry leaves

Serve at room temp with dal rice and ghee with appalam on the side :)
NOTE: Avial almost always tastes even better the next day, so be sure to have some leftovers:)

BHWednesdays

Saturday, October 8, 2011

Almond Oats Ladoos

Yesterday was the Kaaram, Today is the Sweet after all the wonderful comments I received from you - Please round it off with a good cuppa coffee from Starbucks or Dunkin Donuts or better yet, Saravana Bhavan, or Barista :-)
Can there be anything better than incredibly blue skies and a brilliant sun on an extremely cold day (other than blue skies and a brilliant sun on a warm day) ;-) Life is getting back to somewhat normal - I am feeling a lot better and started my day with a kick-ass yoga class. Nothing like a few brisk Surya Namaskars to get the day off to a good start - other than of course, knowing your little one had a relatively restful night and is feeling a lot better today. Wanted to make something guided by gourmet instinct and here's what turned out....Perked up as I am, have decided to send this in for the dessert event at Manjula's kitchen - Nothing ventured, nothing gained, you'll agree :-)- 
The method is very much like Rava ladoos.


In Words

Prep time - 20 minutes 

Ingredients

3/4 cup slivered almonds
1/2 cup of instant oats
1 cup of Turbinado or cane sugar 
1/2 tsp of crushed cardamom
1 tablespoon of cashews
1 tablespoon of sweetened, dried cranberries sliced in half
2/3 stick of butter

Preparation

In a small coffee grinder/magic bullet. powder the almonds, oats and sugar, separately.
Mix them together nicely
Crush cardamom and again mix well
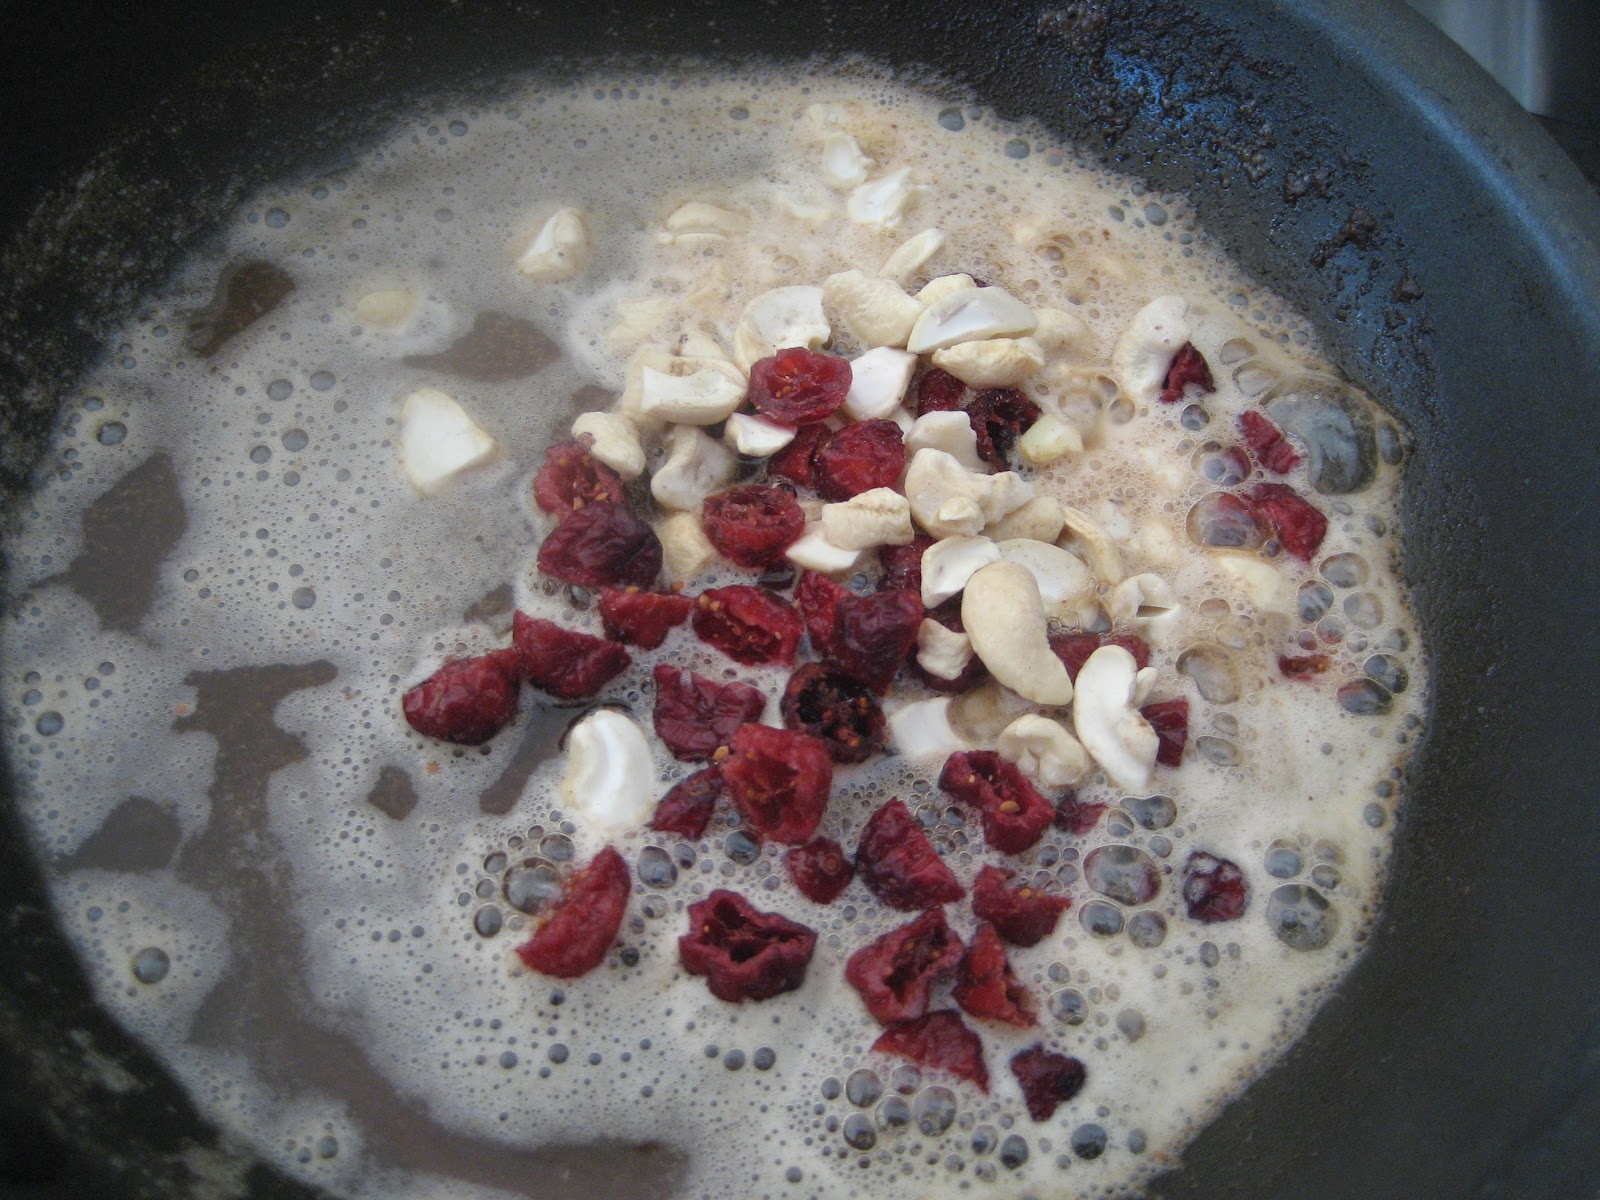
In a small pan, heat butter until it is ghee and add the cranberries and cashews and fry until light golden brown
Strain them and set aside
In the same pan, pour the almond/oat/sugar/cardamom mix and gently fry in medium heat until they sort of appear to come together - this should take no more than 2 - 3 minutes.
Switch off the stove
Add the cranberries and cashews to the ladoo flour and stir in
When it is still moderately hot to the touch, start making the balls (urundais) 
Store in a cool place

Note: If while making the balls, they crumble, chances are you have to heat the flour some more - adding another teaspoon of ghee may also help.
Secret tip: Or perhaps, a not so secret tip, is to put the balls in the fridge for about 30 minutes to allow them to harden a bit. Serve in  your own style. ENJOY

In Pictures


                                          The ingredients measured
powdered
The cranberries and cashews in ghee
now mixed into the powder
my hand trying to make the balls with the hot mix
On the platter :-)
                                                                                          
Last Word: Don't forget to mix in an equal amount of LOVE into the recipe

Reposting for Indus Ladies, Sweets Event

Wednesday, October 5, 2011

Spinach Saboodhana Kichdi & Announcements

Announcements:
1)I am glad to inform my readers that I am the Chef Of the Week at erecipe.com. It's been fun to upload some of my recipes on their blog :) Here is the link to a video that they requested me to share on my blog - Click here to view Thank you Raquel for offering me this opportunity :)


2)IMPORTANT: MY BLOG GIVEAWAYS ARE STILL GOING ON!!! YES INDEED - So Please click here to get to the announcement page - Please ensure you follow all the rules of entry to be eligible for the prizes. 
Blog anniversary giveaways Sept 24- Oct 31, 2011 - so you are not too late to join :) Many of you have wondered if you have missed the deadline - and the answer is NO - there is still time


Saboodhana

I have not cooked much with Saboodhna or tapioca pearls because the few occasions I’ve had it, it has always been really oily, be it as kichdi or vadas. The only right place in my mind for saboodhana is either as a vadam (vadagam) or in payasam! The further disincentive is no one in my family is particularly crazy about it either!
But I saw several saboodhana kichdi posts in the past several weeks and decided I must give this grain another fair chance!
Sadly to the best of my knowledge, tapioca per se has no health benefits – it is starchy and very high in calories, but this has somehow been a staple in Maharastra India as khicdi and vadas– while finding its way to the south in kheers and vadams!
So to add some nutritive value to it, I decided to cook it with spinach and it tasted really good :)
Saboodhana Khichadi
Add caption
Here is how I went about it

1cup of white peal Saboodhana (soaked for 4-6 hours)
1-12oz pack of frozen spinach (thawed) or 2 cups of fresh chopped spinach
¼ cup of peanuts (crushed)
2-3 green chilies
¼ cup grated coconut
Mustard, urad dal, asafetida to temper with in 1 tsp of oil
Salt to taste

Preparation
Drain the excess water from the soaked saboodhana
Put it in a pressure cooker and steam without putting the whistle
Wait a couple of minutes after it starts steaming loudly before putting off
This process considerably reduces the amount of oil used – This is one dish that, like eggplant or arbi, can soak up tons of oil
In a pan temper with 1tsp of oil mustards, urad dal and asafetida
Ad the green chilies and the thawed spinach and add into pan and stir fry for a minute or two
Now add the saboodhana and mix in well with the spinach
Add salt and stir in
In another pan, dry roast the grated coconuts and add to the kichdi
Open cook for a minute or two until all ingredients are absorbed into one another.
Garnish with the crushed peanuts and serve hot J

Sunday, October 2, 2011

Broccoli–Cilantro Curry Sauce

This simple yet superb curry is something I adapted from my wonderful blogger friend, Aysha of Schmetterlingwords
We had just bought some fresh broccoli when she posted this rather handy recipe – I say adapted because I decided to go cilantro & coriander all the way – And while I did use some masala ingredients like bay leaves, I added coconut and made it more like a kootu style! Can be enjoyed with chappatis or rice sticks, or carb of your choice (:
Broccoli Curry Sauce

Ingredients
2 broccoli heads chopped in medium sized florets
1tbsp coriander seeds
1 bunch cilantro
¼ cup grated coconuts
2 Bay leaves
2 green chilies
1 dry red chili
10-cashews
Thadka materials (mustard, urad, cumin, asafetida)
Broccoli curry

Preparation
Steam the broccoli for 2-3 minutes tops in the MW
In a pan add the coriander seeds, cilantro, coconuts and green chilies and roast for a bit, until the incredible smell of the coriander seeds waft around the kitchen or even up stairs (this is usually when my kids poke their heads out of their rooms sniffing with this perpetual question –whatchya making ma- smells SO good yo if it is my son or ma if it is my daughter!

Add some cold water to this and grind to a fine paste in the blender
In a kadai or large wok, add 1 tsp of oil (olive or sesame) and thadka with mustard seeds, urad and asafetida and red chili)
Toss the steamed broccoli in and stir a few times
Add the curry sauce and let the broccoli simmer in the sauce for until the sauce is bubbling and dwindling.
Remove from stove and transfer into a hot pot
Keep your carb ready and attack with gusto ☺